The Deutz 1011 and 2011 series engines don’t rely upon timing gears like many industrial engines, but instead they use a timing belt. This belt should be changed every 3 years or 1,000 hours; whichever comes first. This specification is based on the manufacturer’s recommendation and is only for engines under normal operating conditions. If your piece of equipment is in a mine or other harsh environments, you might want to consider changing your Deutz timing belt more frequently. Because the engine is an “interference engine”, if the belt fails, the pistons will hit the valves and cause internal engine damage. Not only will this add to the list of parts needed, but it also causes unwanted cost and downtime. As a result, we encourage you to change this belt regularly. In our experience, when someone comes into possession of a Deutz-powered piece of equipment, we often see this maintenance item has been missed or neglected. For this reason, we keep timing belts and many other parts in stock and have an experienced team to help you locate the right parts you need.
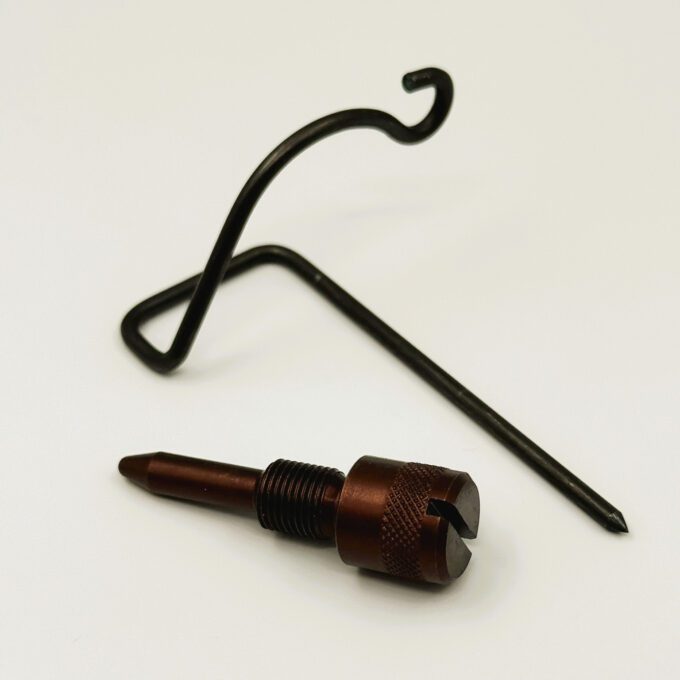
Our timing belt kits come complete with everything you need to finish the job the first time. For a first-time buyer, I would recommend the complete kit, which will come with all the special tools needed to replace the timing belt on these engines and includes a 5-point safety Torx-bit for the pesky lower timing belt cover, two timing pins, and a belt tension gauge for 1011 series engines. We also have kits with or without the most frequently damaged components, if your belt slips or breaks, like push rods and rocker tower bolts.
Changing Your 1011 or 2011 Timing Belt Step-By-Step
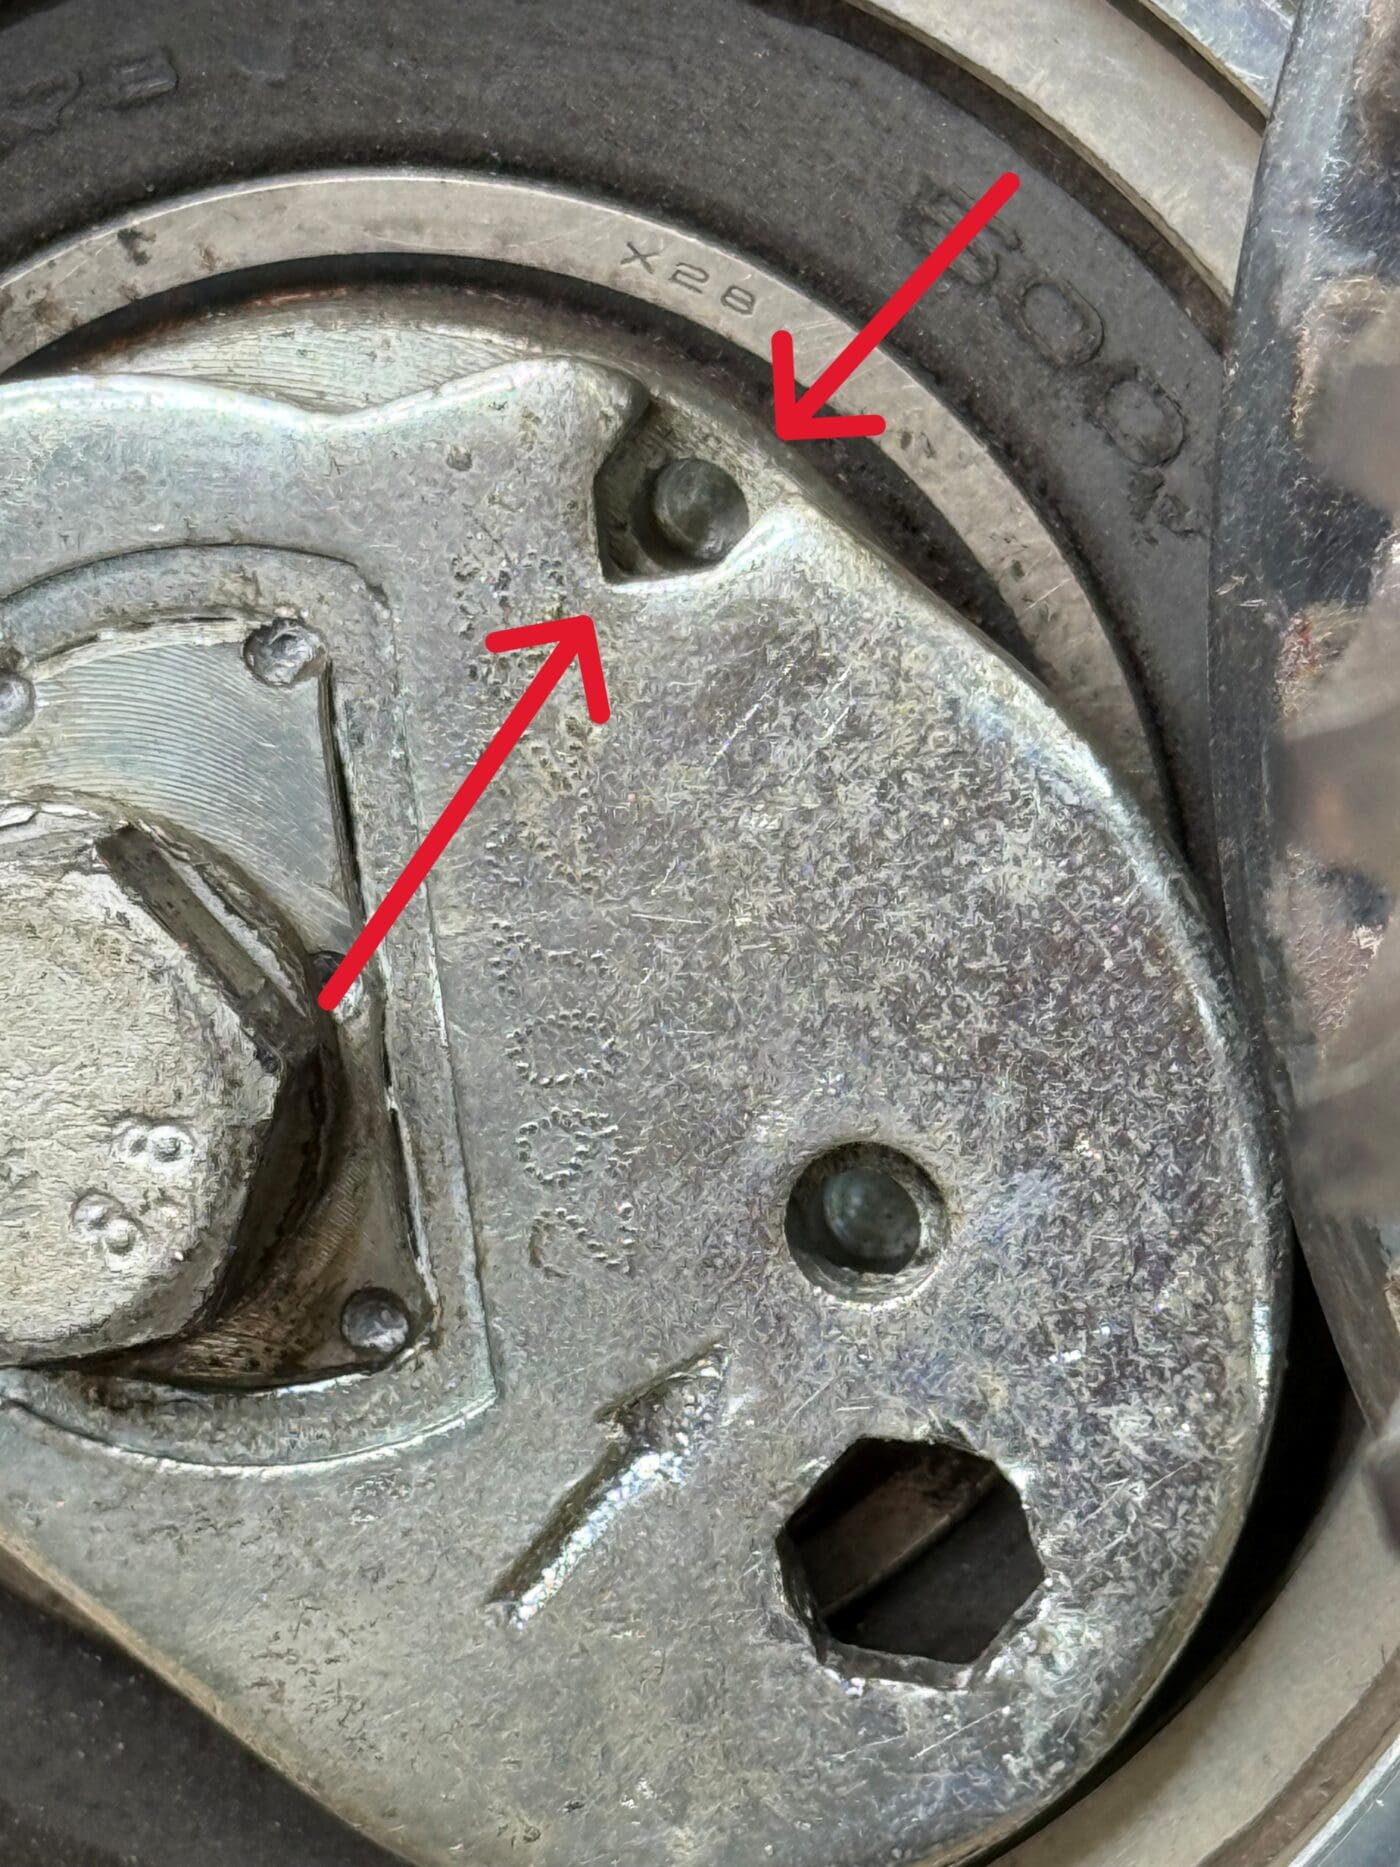
1. Locate the camshaft timing pin hole: Viewing the engine from the front, this threaded camshaft hole is located on the left rear side of the engine block. The camshaft has an offset hole so the pin can only go in one way, so that the camshaft can’t be pinned 180 degrees out of time. Remove the plug that fills this hole, set it aside for later, and insert the timing pin in this hole first, screwing until the pin stops.
![Timing Belt - Hole-Hole Location [first of two]](https://www.foleyengines.com/wp-content/uploads/2025/07/Timing-Belt-Hole-Hole-Location-first-of-two-1400x1867.jpeg)
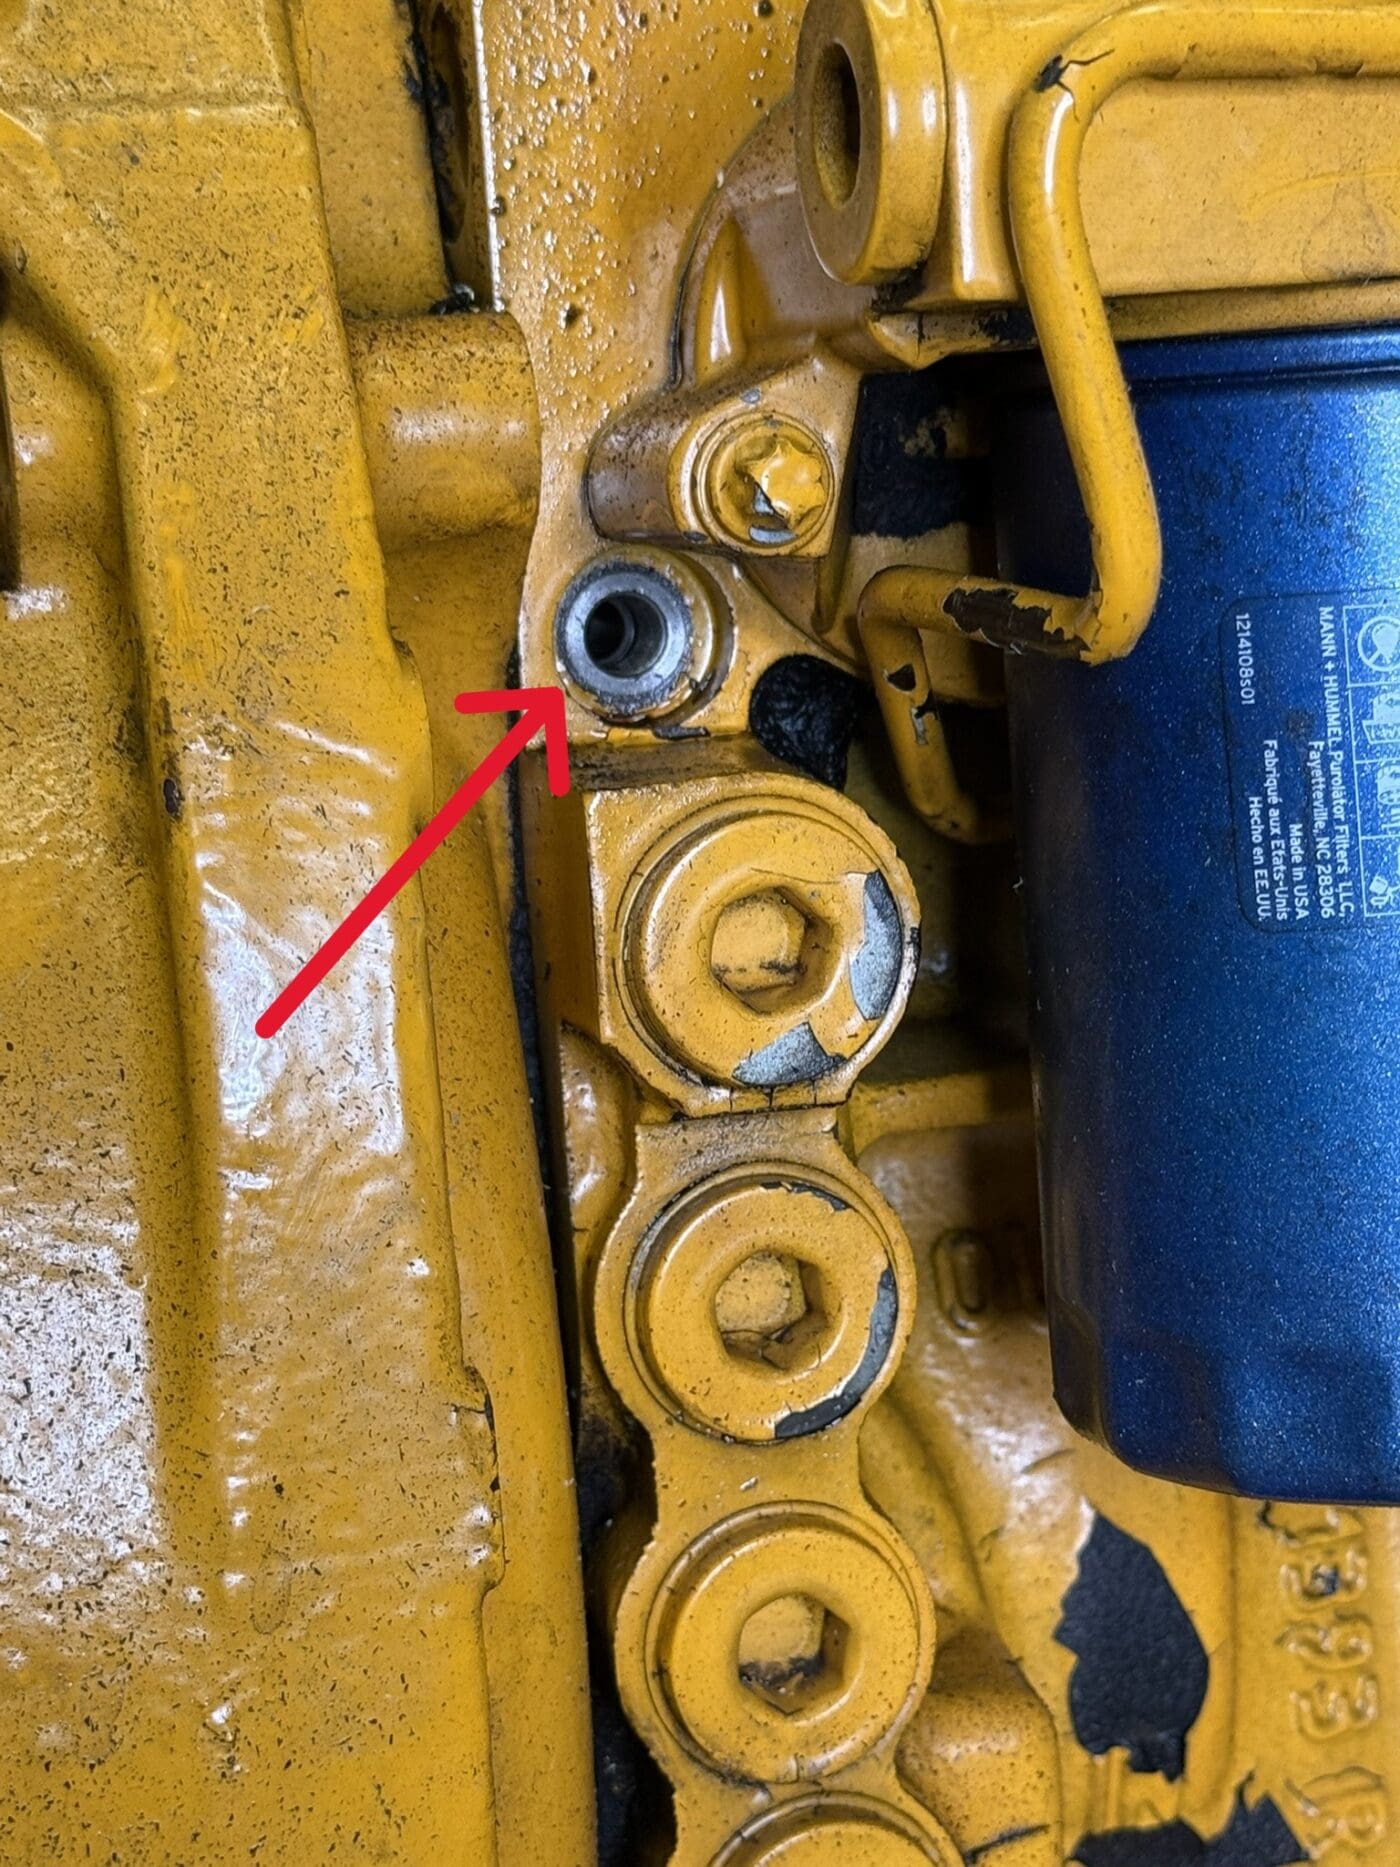
2. Locate the crankshaft timing pin-hole: Viewing the engine from the front, this threaded hole is located on the front right side of the engine block. Remove the plug that fills this hole and set it to the side until later
3. You will need to verify crankshaft timing. For the crankshaft, first remove the fuel injector closest to the front of the engine (the front is where the timing cover is located). Now rotate the engine, by hand, until this front cylinder piston is at top dead center. Caution: Be careful not to find TDC on the #1 cylinder, which is actually located closest to the rear of the engine and is “#1” for the purpose of cylinder firing order. You must find TDC on the front cylinder only (the cylinder closest to the front crankshaft pulley).
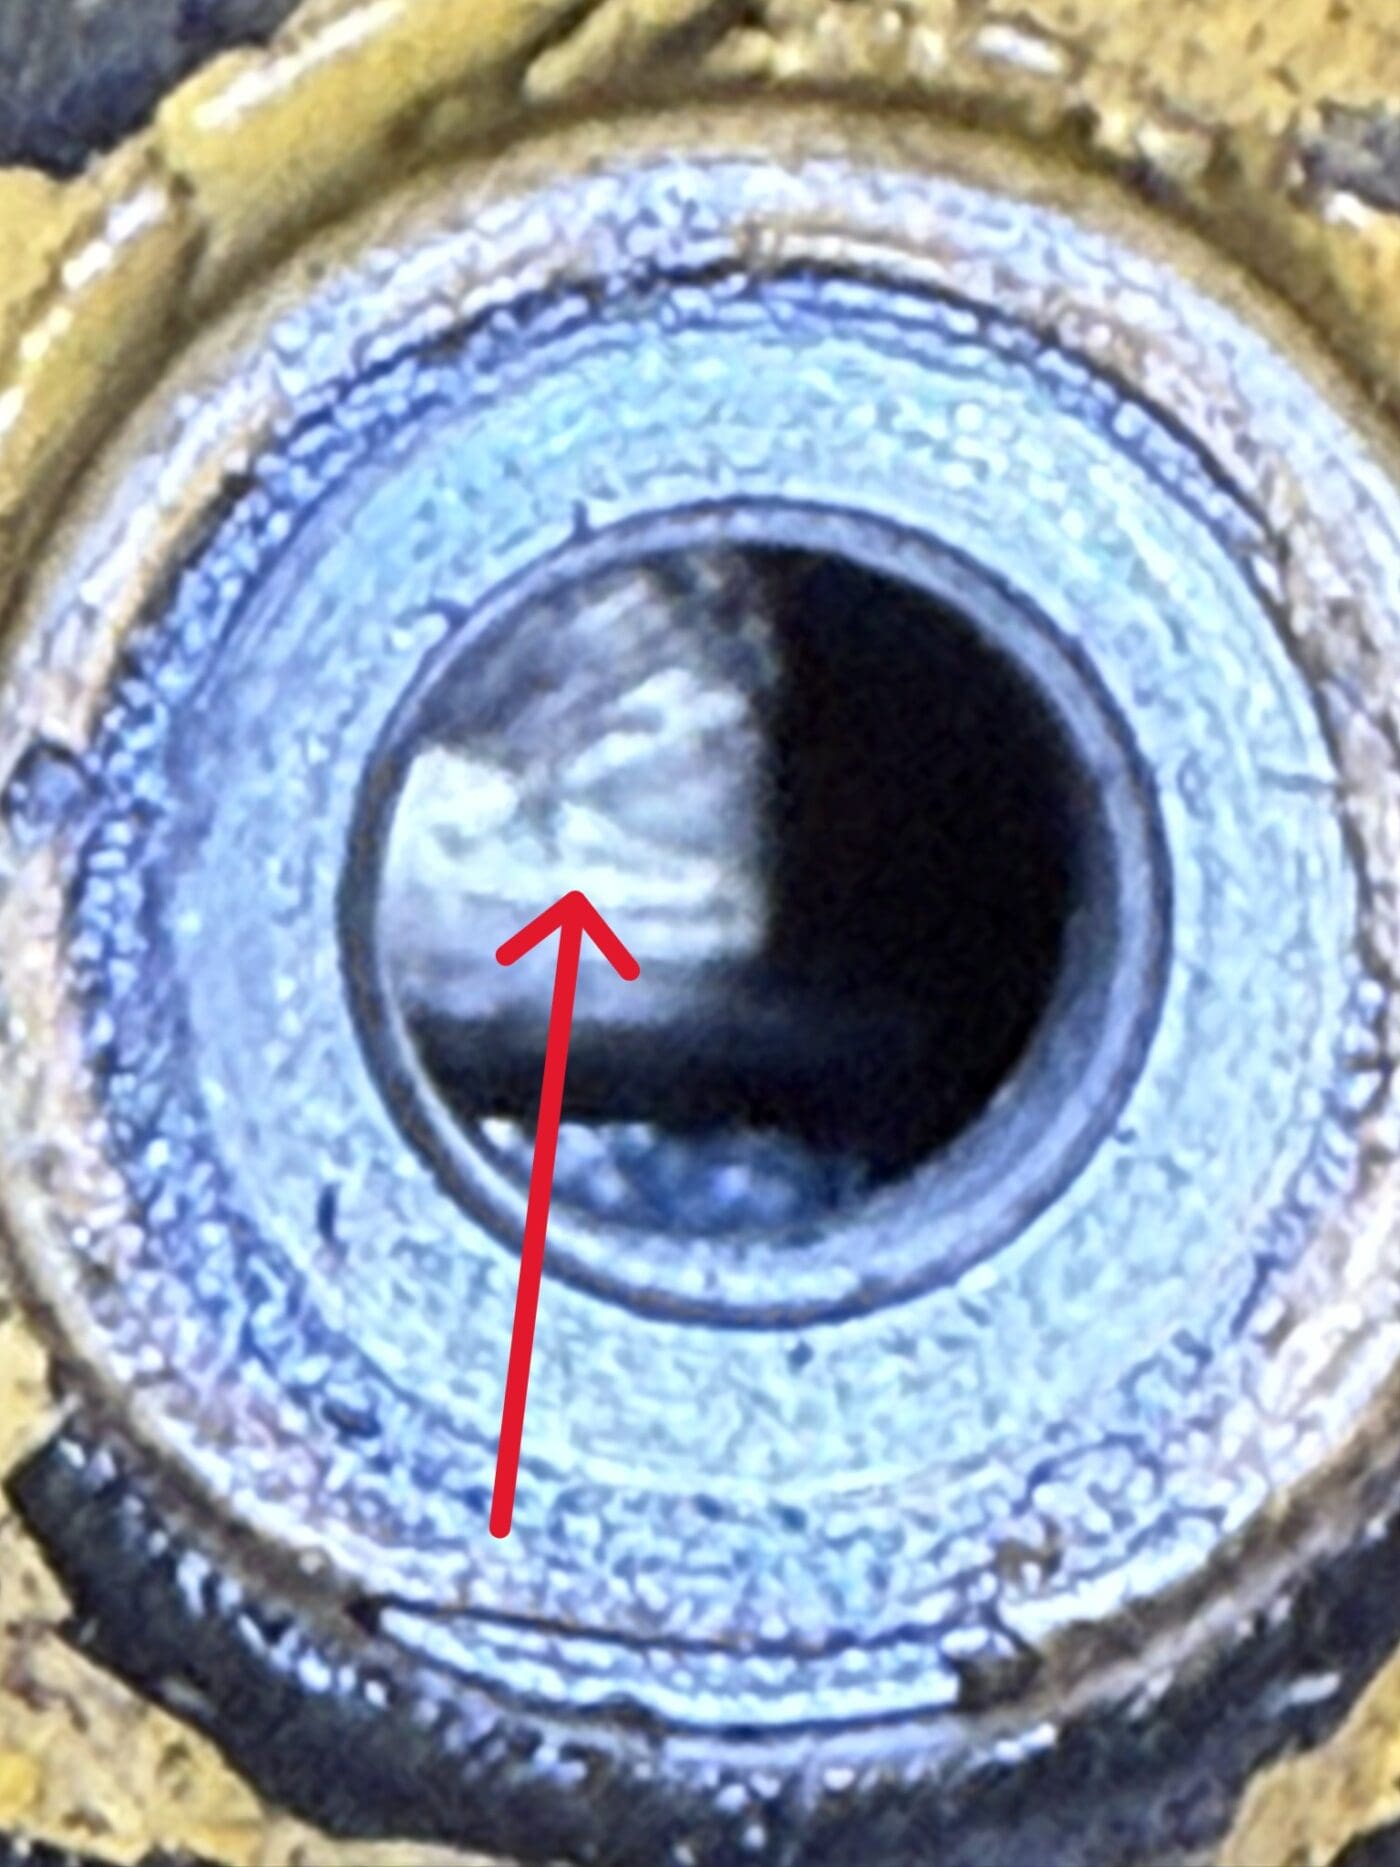
4. Once TDC is found, verify the timing of the crankshaft by looking through the crankshaft pin hole. If you can see the machined surface of the crankshaft, then you are in the correct position. If not, rotate the crankshaft 180 degrees and put it at top dead center again. You should see the machine surface on the crankshaft now, and you can install the timing pin in the crankshaft timing hole. Unlike the camshaft, the crankshaft can be pinned in the incorrect position.
- Next, rotate the crankshaft clockwise (as viewed from the front of the engine) until the crankshaft stops or hits the timing pin. Your crankshaft is now in time. Note that this pin does not hold the crankshaft in place but only touches the crankshaft on a machined surface. Be sure not to rotate the crankshaft while installing your new timing belt.
- The next step will be loosening the camshaft timing gear bolt. You will need to hold the gear, which can be done with a large combination wrench or crescent wrench. This must be done so you do not bend the timing pin or, even worse, shear it off.
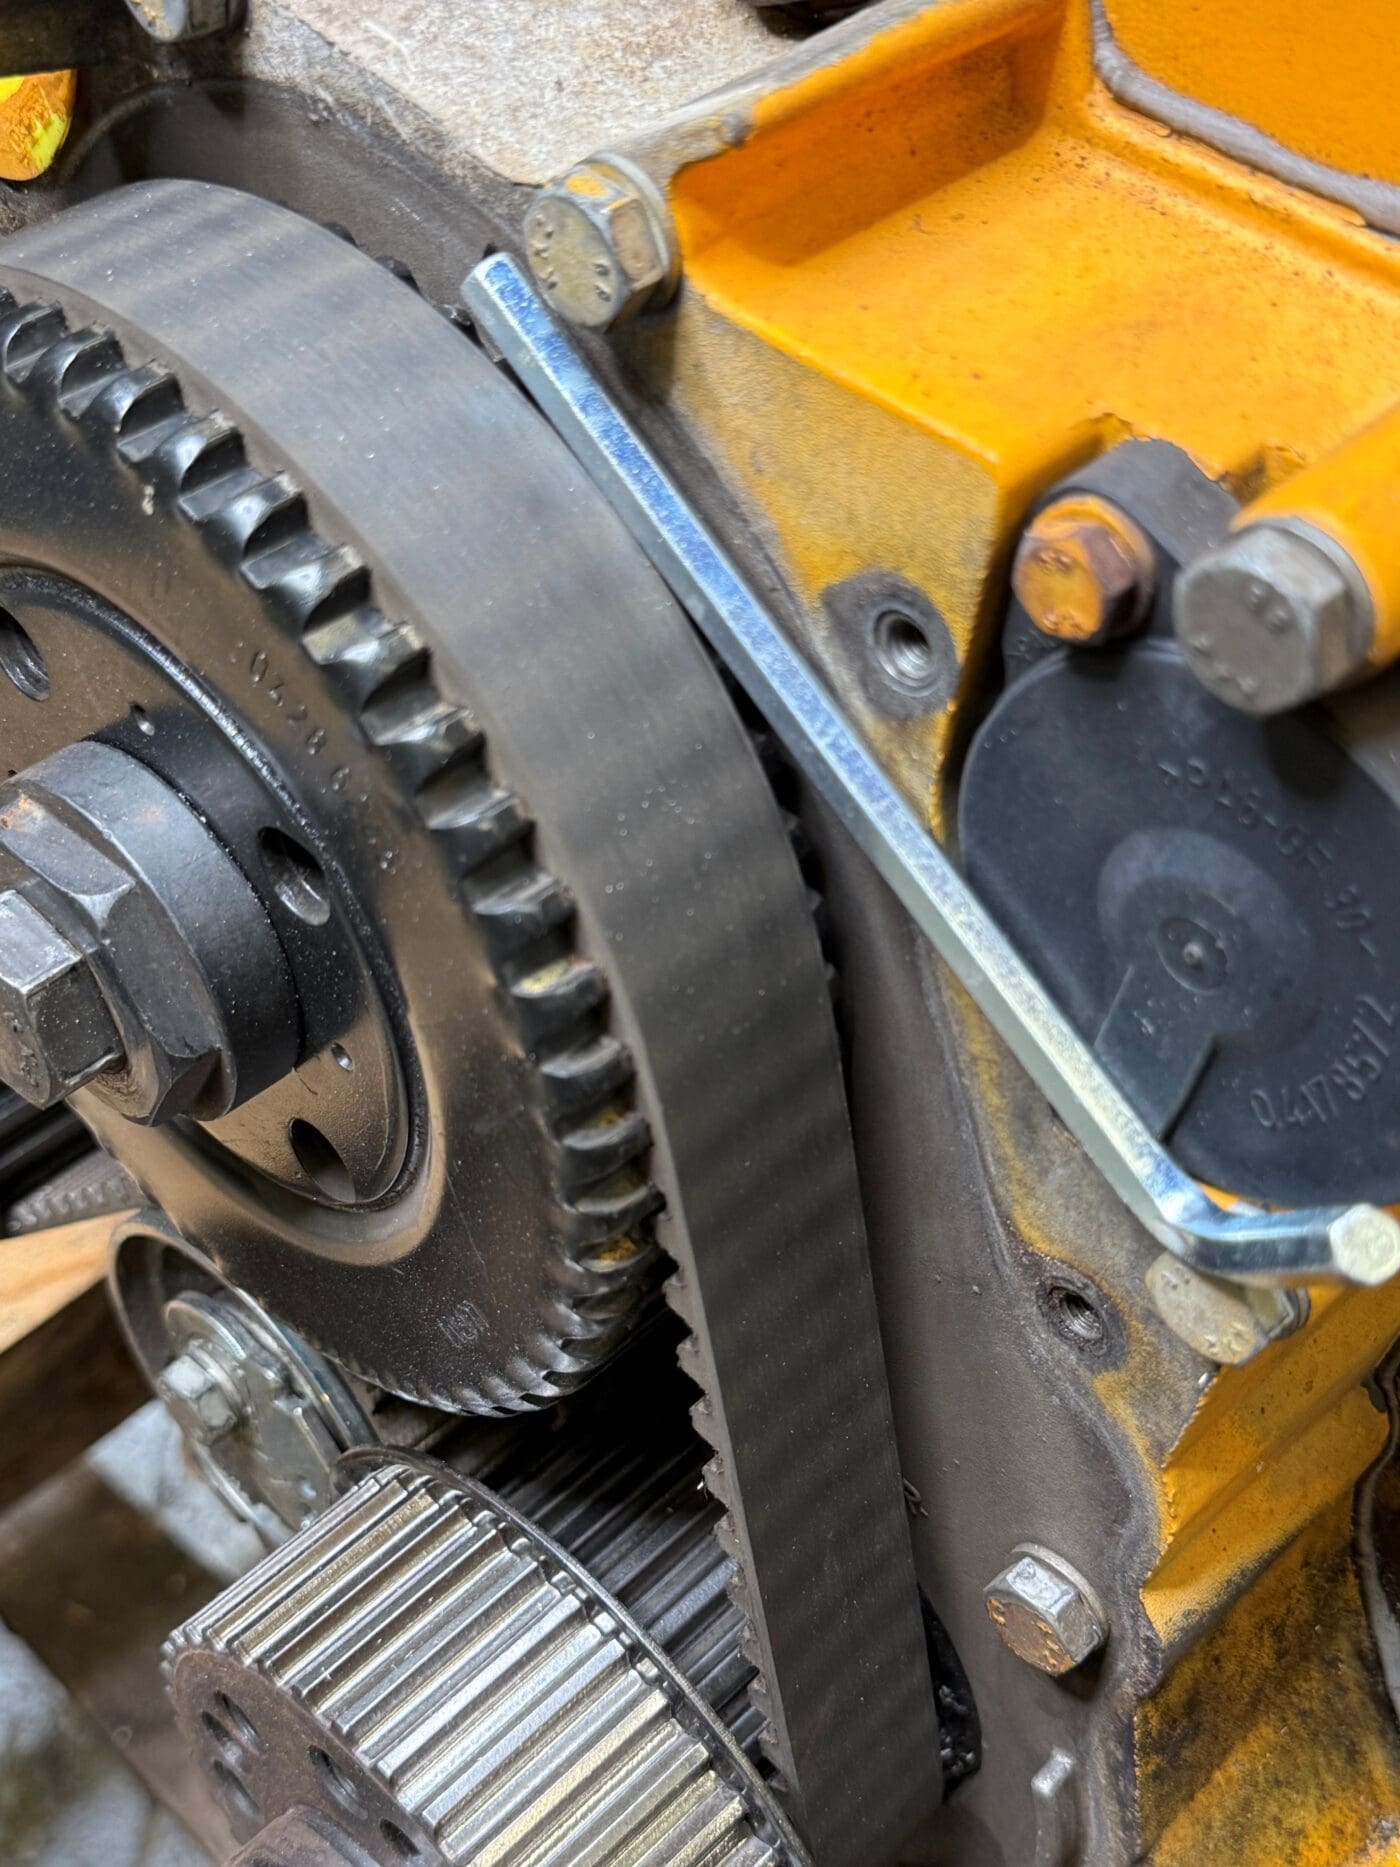
7. Install the new belt before installing the new tensioner (the tensioner should be replaced each time you replace the timing belt). The belt is nearly impossible to get on if the tensioner is already installed. Install the tensioner with the hold-down bolt finger tight after the belt is in place. Once both the belt and tensioner are installed, you will need to check the location of the belt on the pulley. You can do this with an 8mm Allen key; place the Allen key on the gear between the belt and the front cover/governor. If the belt is in the right position, the Allen key should fit and touch the front cover, and just touch the side of the timing belt. Adjust the belt if necessary so the belt is riding in the correct spot.
- Next, you will need to set the correct tension on your timing belt. If you have a Deutz model 1011 or 1011F, continue with step 8 below; if you have a Deutz model 2011, skip to step 10. The difference between steps is because the 1011/1011F tensioner is a static tensioner while the tensioner for the 2011 is spring loaded with the tension set using a guide that is built into the tensioner itself.
- On your 1011 timing belt, place the tension gauge between the oil pump pulley and the camshaft pulley with the gauge facing the rear of the engine. Using an Allen key, rotate the tensioner counterclockwise while watching the belt gauge. You will need to rotate the pulley until the tension on the gauge registers the correct tension. The direction of rotation is important as it forces the belt to wrap around the crankshaft pulley further. This ensures the belt will not skip timing during rapid load changes. Now secure the tensioner bolt to 30nm (22 ft lbs) and skip to step 11.
10. For 2011 engines, you won’t need a belt tension gauge since you can rotate the tensioner in the center of the tensioning pulley counterclockwise with an Allen key to adjust the tension until the small, machined dot on the outside of the pulley housing is oriented in the tensioning groove. The direction of rotation is important as it forces the belt to wrap around the crankshaft pulley further. This ensures the belt will not skip timing during rapid load changes. Secure the tensioner bolt to 30nm (22 ft lbs).
- Once the tensioner is secured, verify there are no loose spots or slack in the belt visually. If none are present, tighten the camshaft bolt you loosened earlier to 30nm (22 ft lbs).
- Remove the timing pins from the crankshaft and camshaft. Mark a position of the camshaft pulley on both the pulley and the front cover. Rotate the engine clockwise so the mark on the camshaft pulley makes a 360-degree turn and verify the marks you made are lined back up, which ensures that you can reinstall the pins in the same location you removed them in the next step.
Confirming Your Timing Is Correct
- Reinstall the camshaft timing pin. You may have to make small adjustments using the cam bolt to line the pin hole up, but be sure not to loosen the bolt as it can throw off timing.
- Using a torque wrench with the camshaft pin installed, rotate the crankshaft clockwise with 40nm (29 ft lbs) of force. This will put a preload on the timing belt to simulate engine running conditions.
- Carefully reinstall the timing pin for the crankshaft, making sure to stop screwing the pin in when the pin first contacts the crankshaft. This will likely be before the timing pin bottoms out on the crankcase. From when the pin first contacts the crankshaft, start to count the revolutions of the pin while continuing to turn it in the same direction until it reaches the end of the threads and bottoms out on the crankcase.
If everything was done correctly, the revolutions you counted should be between 0.75 (¾) and 2.25 (2 ¼) complete rotations to bottom out the pin on the crankcase. If this is the case, continue to 17 below. If not, loosen the camshaft bolt, being sure not to break the timing pin, and remove the timing belt and tensioner. Rotate the now loosened camshaft gear a few teeth and reinstall the belt starting at step 7.
- If you have a 1011 or 1011F engine, reinstall your timing belt tensioner gauge and verify the tension on the belt is still within the acceptable range. If you have a 2011, please check the alignment of the mark to the groove on the tensioner pulley. If the belt tension is too high or too low, carefully adjust it as needed, making sure not to remove the timing pin or let the belt loosen too much. Once the tension is set, retorque the tensioner bolt to 30nm (22 ft lbs).
- Once the tension is set and in spec, remove the timing pins and reinstall the cover plugs that were removed to install the timing pins.
- Lastly, before starting to reassemble the engine, you need to yield the camshaft bolt. Verify the camshaft bolt is still torqued to 30nm (22 ft lbs) and then tighten the bolt an additional 210 degrees. This can be tough to do by yourself, so an extra pair of hands might be a good idea. Be careful not to let the timing belt rotate too much, since it is possible to skip a tooth during the process of tightening the camshaft bolt.
- Once this is tight, you are done with the timing portion of this engine. Congratulations. If you have questions about anything in these instructions, please feel free to give us a call. Our team would be happy to assist you in any way we can.